Abstract #1
|
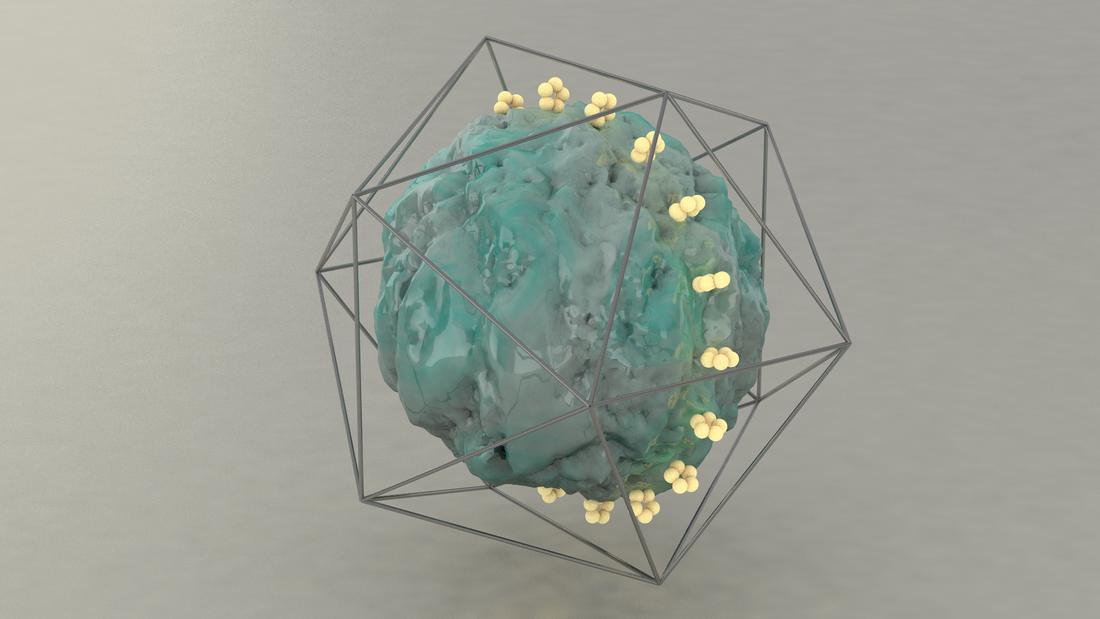
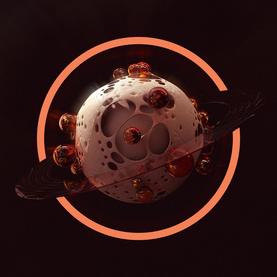
Caged Development
Cinema 4D Render 50.8 cm x 28.6 cm September 2018 Exhibition Text
As a teen I am still developing physically, mentally and emotionally. However much of this development is hindered and controlled by the "cage"/confines of high school, peers, stereotypes or other unfortunate events. I sought out to create an abstract piece heavily inspired by the works of Patrick Foley, that shows the idea of "Caged Development". The large mass in the center represents you and the surrounding spheres are our influences, all of this is contained by the cage. |
(Click To Enlarge)
|
Planning
|
Inspiration
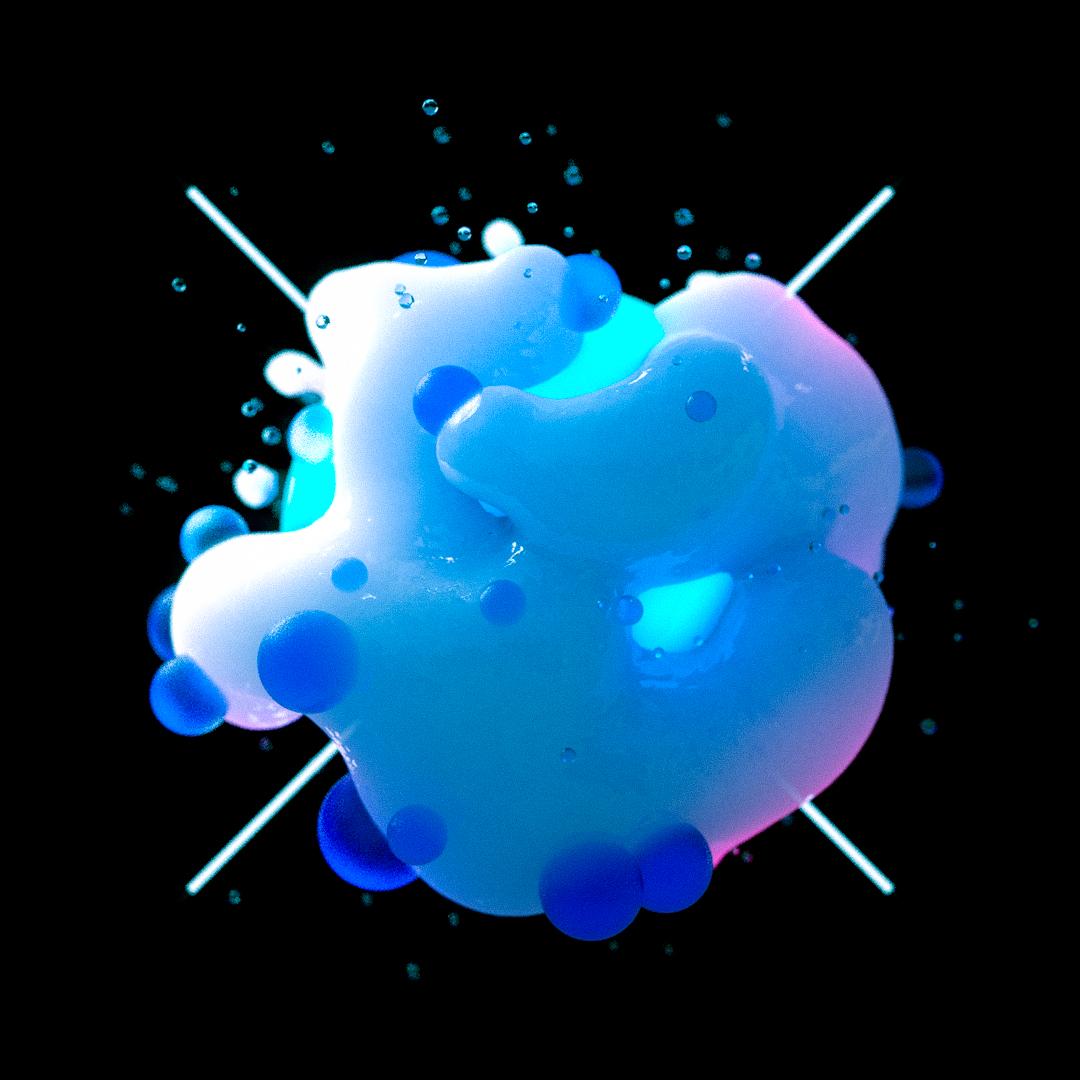
Seeing as the 3D digital art medium is still a very and modern art style there are many people creating in the medium but very few artists creating in the medium. Patrick Foley is an artist seeking to create developed aesthetics centered around abstract art. He started as a photographer and cinematographer but later moved into Motion Media design. Much of his work is purely abstract and would be nearly impossible to replicate in a more traditional medium. He shares many of his techniques online and is extremely well versed in the Cinema 4D software. Patrick's work inspired me to pursue more diverse and unique forms when it comes to modelling in 3D. All of my previous works in 3D have been focused on some form of realism or at least accuracy to a real life model. My initial thought with this project was to simply create an abstract piece devoid of meaning, however as I continued to create new forms in the program I came to the realization that simple forms can bring significant meaning to a piece. His work helped me an extensive amount in figuring out how to use the software tools to generate and mold an abstract form that has a balanced number of segments and objects. As I continued to work through the planning process I started to stop adhering to the idea of fully planning out my work before starting and simply went in with the mindset of adding to the piece. After multiple of days of adding to the base sphere and surrounding objects I started working on texturing which was inspired by the shiny orbs found in his piece "Planetary Dinosaur Egg". I plan on continuing to follow his work for inspiration and would like to incorporate his lighting techniques into my next piece in the software. |

"Planetary Dinosaur Egg", 2018, Patrick Foley
"Abstract Render", 2017, Patrick Foley
|
Planning Sketches

|
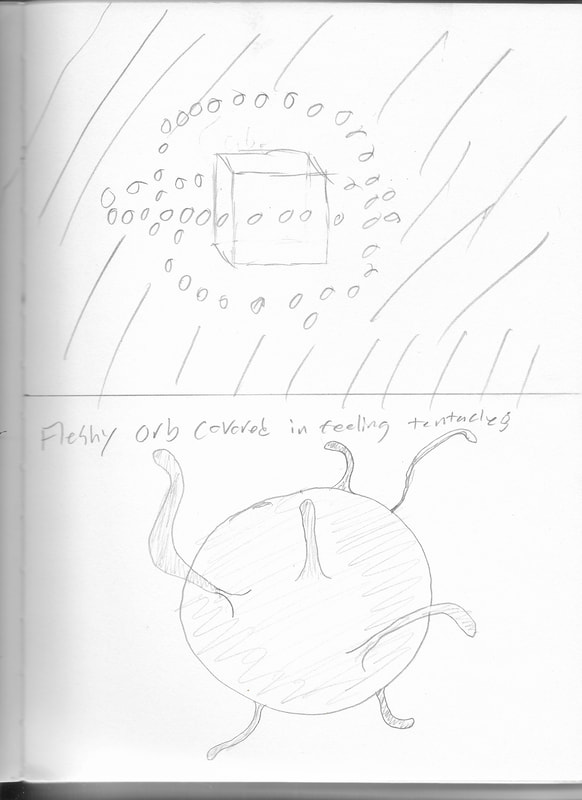
Sketch #1
The first sketch I did was based on a mixed media I created last year titled "White Cube", I was thinking about fusing my two mediums together through a common shape as to help maintain my current theme of abstraction. The surrounding balls would have been made of cloner modifiers as are used in many of Patrick Foley's pieces. The cube would be a matte white and the orbs would be emit black light onto the scene. The background would have been based on X-Particles grown with mograph. The orbs would orbit the cube similarly to the rings on Saturn. As I began my design process within the software I realized the shape was to plain and simple to look intriguing and clearly communicate any meaning. Sketch #2 My second sketch was based on the octopus from Finding Dory. It would have been a flesh simulated ball with smooth tentacles breaching off of it. I am still very interested in creating the project however whilst designing I realized I was not yet skilled enough to create a material at this level of complexity. I plan on doing more research on these complex textures and materials and figuring out how to tie them into my inspirations style of creating. I ended using my base mesh used in attempting this project as my base for the deformers on my final project. The tentacles also helped me figure out how to create my cage based on cylinder objects. Sketch #3 My final "sketch" was me digitally exploring some of my program capabilities. I was planning out how I would I would use different displacement modifiers to ripple the surface of the sphere. I also planned out the software UI setup I would use, this is very important seeing as it can significantly help your process and work flow if it is set up correctly. Finally I also experimented with some basic framing and composition that mirrored some techniques used by Patrick Foley. |
Process
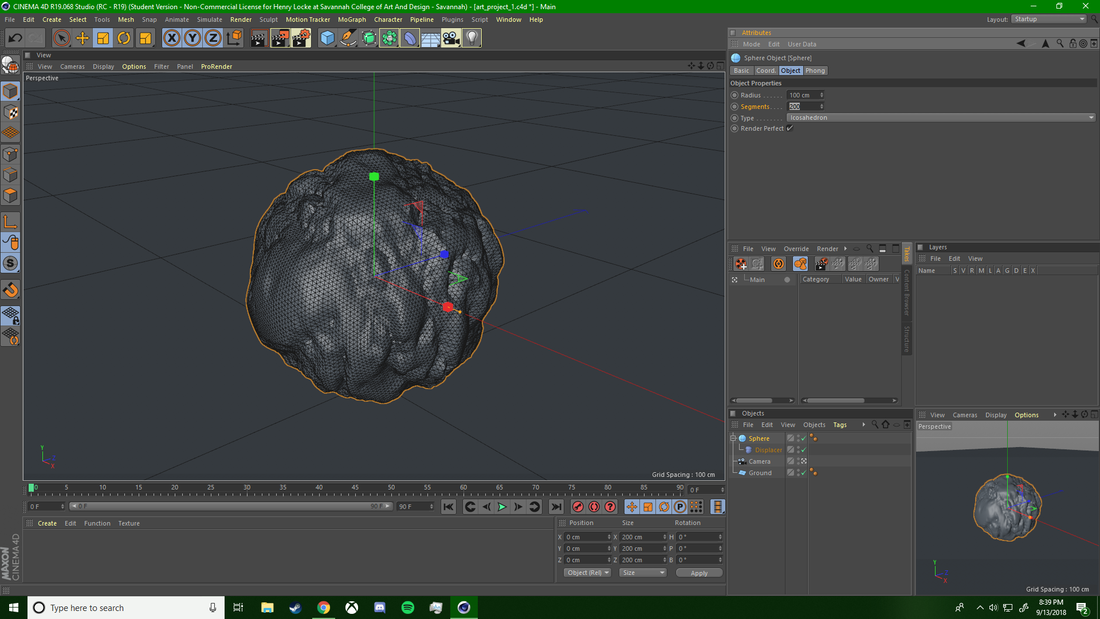
Modelling:
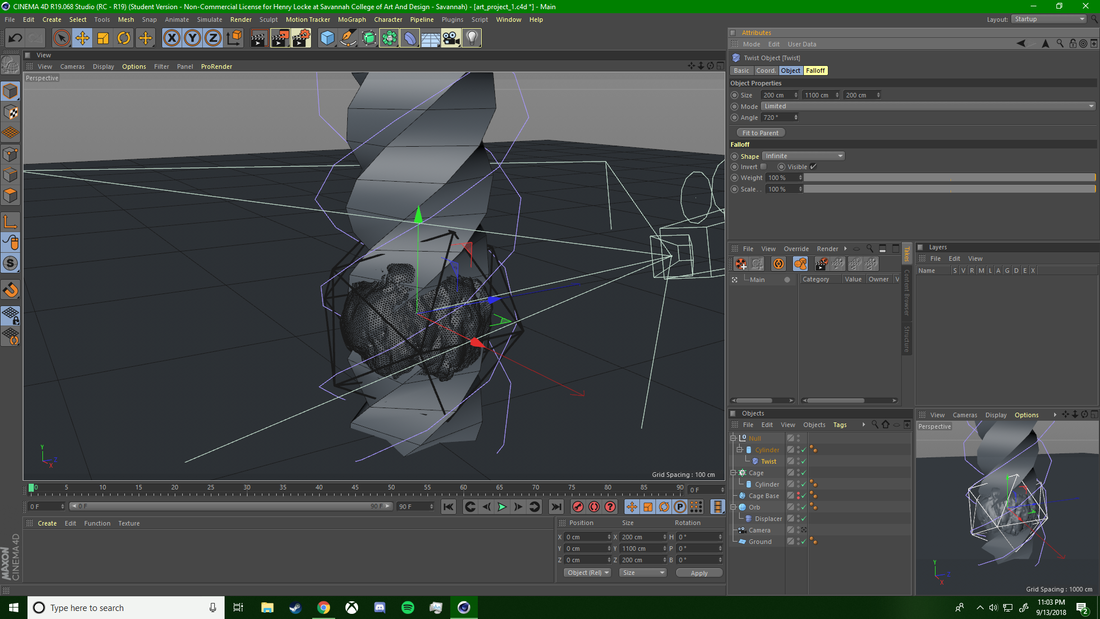
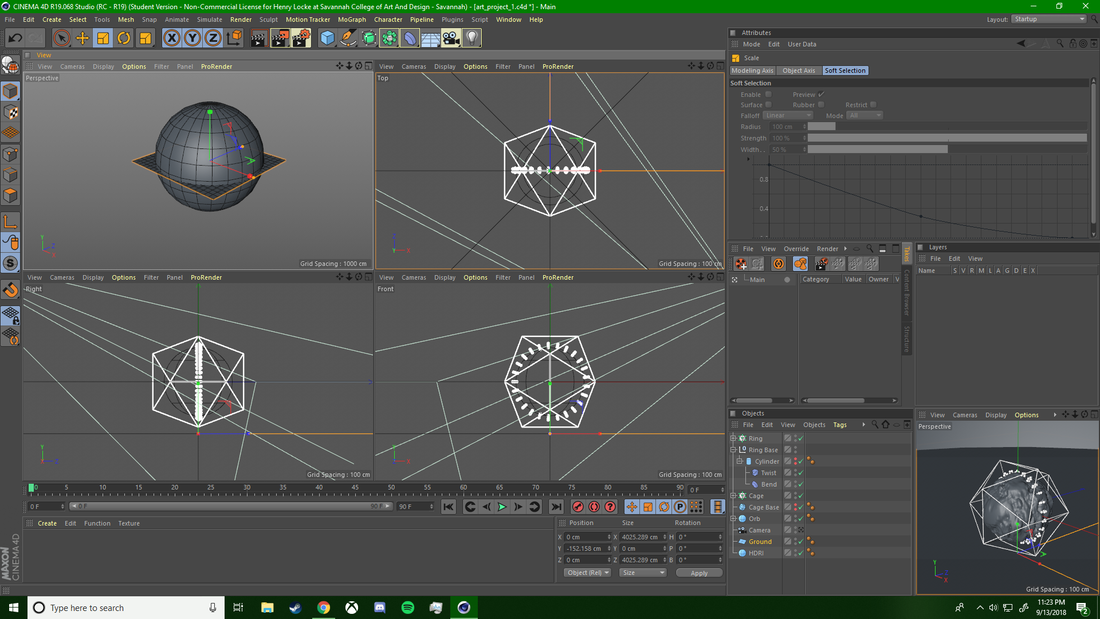
The first step for me is setting up my scene with a camera and basic models in place. As you can see down below the first object I worked on was the sphere/orb, to start this I created a perfect sphere and then attached a displacer modification to the sphere as a child object. To make the sphere contort in the way it does I had to enter a displacement map, the displacement map is simply a black and white image that has saturation gradients that control the depth and length of the displacement made to the sphere. I spend about 20 minutes to set up the initial settings and then following that I will tweak it consistently throughout the rest of the project, the goal was to get an organic shape that had some sort of implied movement to it. The next object I modeled was the cage, I studied Patrick's techniques pretty closely to create this cage efficiently. I created another sphere but lowered the number of faces to 20, once the faces were established I hid the object so that it wouldn't be visible in the rendered view and attached visible cylinders to each of the objects edges thus creating the outline of the shape, which also became my symbol for a cage. The process to create the orbs is a bit to complex to type out however it was primarily done by creating a long rectangle, adding twist and bend modifiers to it until it begin a twisted circle, hiding the object, and then creating a cloner modifier with spheres as bases. Those bases only applied to the rectangle vertices. None of this modelling was easy or even worked the first time, however through lots of research and much exploring in the software I discovered efficient ways to create unique designs.
The first step for me is setting up my scene with a camera and basic models in place. As you can see down below the first object I worked on was the sphere/orb, to start this I created a perfect sphere and then attached a displacer modification to the sphere as a child object. To make the sphere contort in the way it does I had to enter a displacement map, the displacement map is simply a black and white image that has saturation gradients that control the depth and length of the displacement made to the sphere. I spend about 20 minutes to set up the initial settings and then following that I will tweak it consistently throughout the rest of the project, the goal was to get an organic shape that had some sort of implied movement to it. The next object I modeled was the cage, I studied Patrick's techniques pretty closely to create this cage efficiently. I created another sphere but lowered the number of faces to 20, once the faces were established I hid the object so that it wouldn't be visible in the rendered view and attached visible cylinders to each of the objects edges thus creating the outline of the shape, which also became my symbol for a cage. The process to create the orbs is a bit to complex to type out however it was primarily done by creating a long rectangle, adding twist and bend modifiers to it until it begin a twisted circle, hiding the object, and then creating a cloner modifier with spheres as bases. Those bases only applied to the rectangle vertices. None of this modelling was easy or even worked the first time, however through lots of research and much exploring in the software I discovered efficient ways to create unique designs.

|
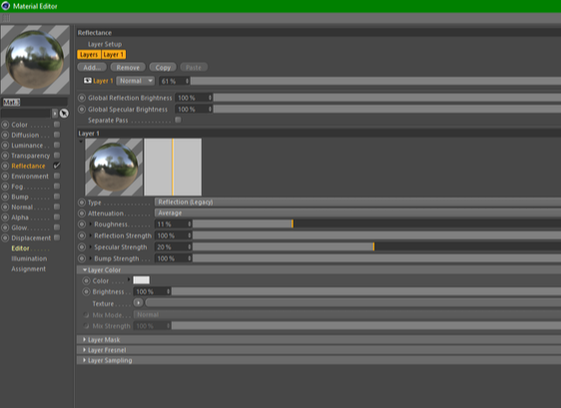
Lighting and Material Design:
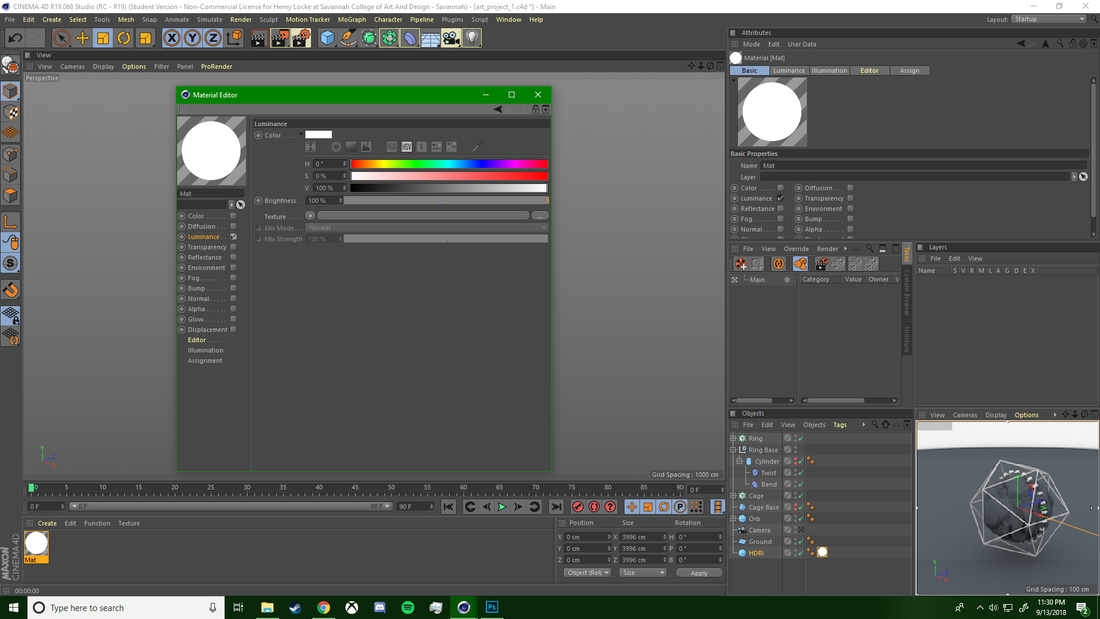
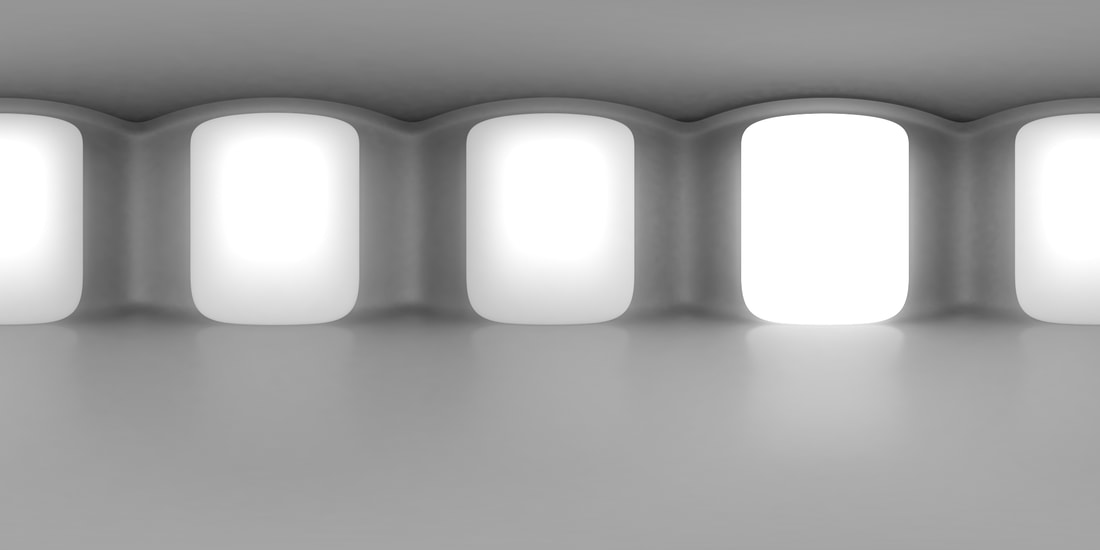
Before applying materials to the objects in the scene it is paramount to figure out some basic lighting. To begin lighting my scene I created a sphere and applied a 360 degree image of lighting panels to the sphere as a material, following this I enabled luminescence on the object. When it comes to creating materials for the project everything was made self generated noise maps and color gradients. To create a new material you go into the material editor, create a new base material, and from there I would edit that material based on what look I was trying to achieve. To create the cage material I enabled the reflectance channel, I turned the reflectance up to the max but then added some roughness so that not everything reflected within the material. For the center sphere I created a new material that also had reflectance enabled but brought that value way down, on top of that I added a texture with a little noise enabled to it and colored it blue mixed with grey. For the other orbs surrounding the center sphere I used a similar texture but then made them glow slightly by adding a little luminescence. I seek to create more polished and interesting looking materials in the future, in particular I was not satisfied with my mini orbs that surrounded the primary sphere, I would like them to look more alien and space age in the future. |
|
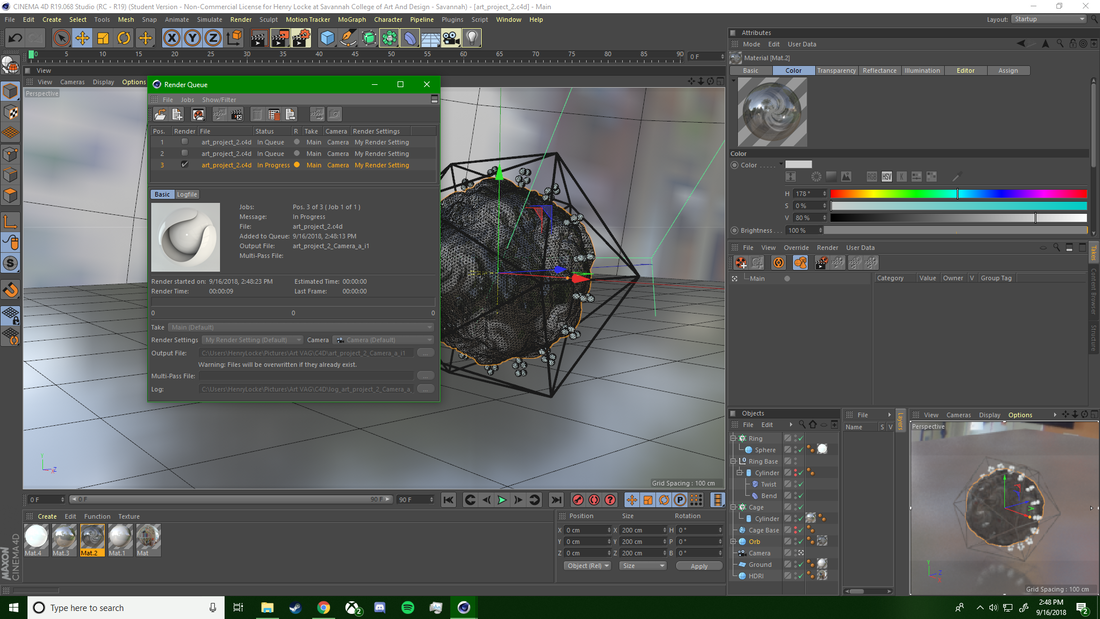
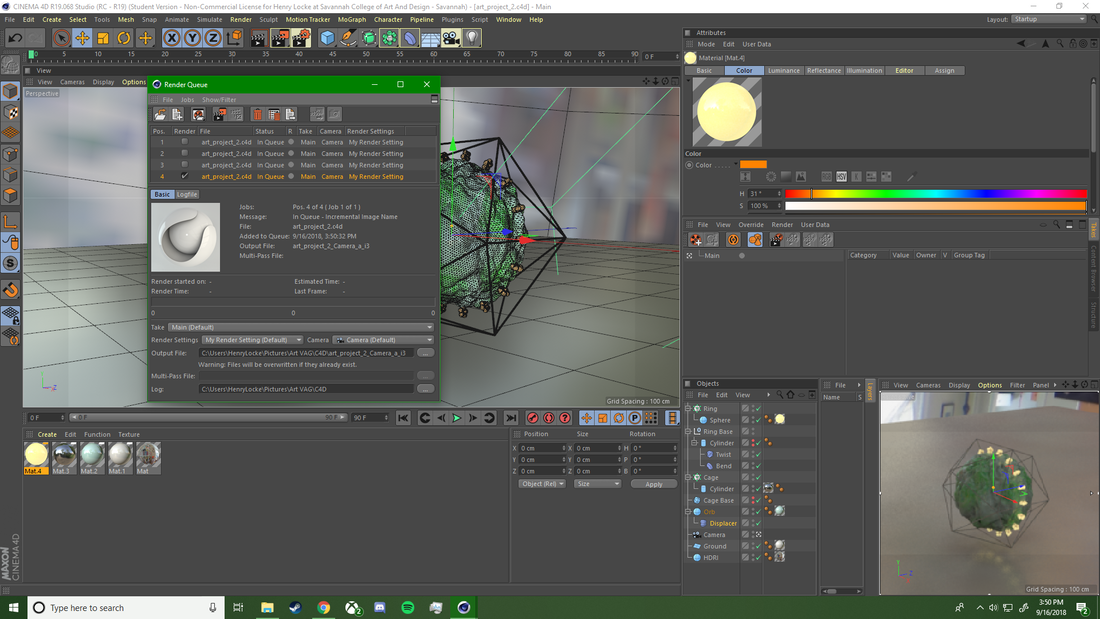
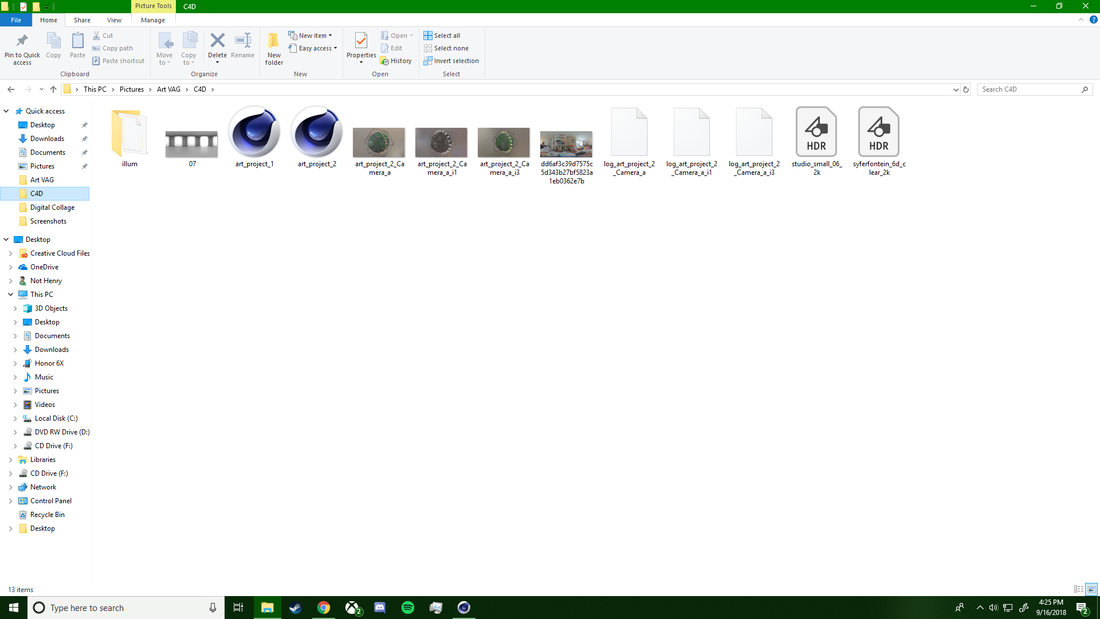
Rendering and Organization:
Listed above are file organization screenshots and in progress rendering screenshots. Figuring out ideal rendering settings is very tedious and takes quite a bit of time. In total I rendered out 15 frames just to get these settings correct. Each render takes 12-20 minutes, and during that time you don't get to see the frame rendering as to get an idea of what the image looks like. After each render I check the frame for a few key things, objects meshing together, white noise, over reflectance, and specular highlights. To tweak these settings I would change different things in the render engine settings such as sampling, depth of field, global illumination, and diffuse depth. These all edit how the CPU will process each color value given by the project. All of this work I saved into a designated project folder on my computer so that if something ever happened I would always have an organized place of reference. Down below I have my final rendered image and my grey scale image. The grey scale image is what my project looked like before any materials were applied, this is the stage in which I establish lighting and general frame composition. Feel free to move the slider back and forth on the image to see the difference.
Listed above are file organization screenshots and in progress rendering screenshots. Figuring out ideal rendering settings is very tedious and takes quite a bit of time. In total I rendered out 15 frames just to get these settings correct. Each render takes 12-20 minutes, and during that time you don't get to see the frame rendering as to get an idea of what the image looks like. After each render I check the frame for a few key things, objects meshing together, white noise, over reflectance, and specular highlights. To tweak these settings I would change different things in the render engine settings such as sampling, depth of field, global illumination, and diffuse depth. These all edit how the CPU will process each color value given by the project. All of this work I saved into a designated project folder on my computer so that if something ever happened I would always have an organized place of reference. Down below I have my final rendered image and my grey scale image. The grey scale image is what my project looked like before any materials were applied, this is the stage in which I establish lighting and general frame composition. Feel free to move the slider back and forth on the image to see the difference.
Experimentation
Experimentation is paramount to making progress and growing in the world of software art and proficiency. As I previously stated much of my experimentation was done through modelling and remodeling and heavily revising my materials. Below are four separate images in which I changed materials, colors, forms, and organization. I primarily tweaked the colors as you can see, eventually I came to the realization that all of the materials needed to be redone and that is when I stripped the model back into it's grey scale form and then rebuilt the materials from the ground up. That's when I arrived at the grey-blue based color/material scheme. Looking back on the project I wish I had experimented slightly more with the different shapes I could have potentially bound to the cloner modifier. Additionally I attempted to make a transparent black and white render however it simply didn't look good, I plan on doing more experimentation with make simplicity work.
Reflection
I am overly satisfied with my end product for this project, however that never means there is not room for improvement. Perhaps one of the weaker parts of this abstract piece is its ability to demonstrate my theme but also its connection to meaning. I passionately love the process behind creating abstract art but also the end result, however I sometimes rush the process and do not do sufficient planning before starting my work. Initially I was worried that I wouldn't be able to adapt to the software quickly enough, but through constant reference to Patrick's work and many hours of trouble shooting I was able to eventually establish an efficient workflow that I believe resulted in a high quality product that is very unique and polished.
"Planetary Dinosaur Egg", 2018, Patrick Foley
Differences:
|
Compare & Contrast:
Similarities:
|

"Caged Development", 2018, Henry Locke
Differences:
|
ACT Responses
Clearly explain how you are able to identify the cause effect relationship between your inspiration and its effect on your artwork.
Patrick Foley's work not only inspired the content of my artwork but also the medium by which I created it in. His work influenced my technique as well, many digital morphing processes were developed by referencing his work.
What is the overall approach the author has regarding the topic of your inspiration?
The author approaches my inspiration with much praise for the excellent techniques used but also the understandings of color, light, and shape that are displayed.
What kind of generalizations and conclusions have you discovered about people, ideas, culture, etc. while you researched your inspiration?
One very interesting generalization made about artists who work in digital software such as 3D rendering engines is that they are just 3D Rendering Artists, it is implied that they are not just artists or that they do not fit under the category of fine arts.
What is the central idea or theme around your inspirational research?
My central idea and theme continues to be that of exploring the abstract and finding new and creative ways to bring the abstract into fine arts. I want to create images that have a core function in representing an emotion or concept, but I don't want it to be easily interpreted.
What kind of inferences did you make while reading your research?
I made many inferences about the amount of skill required to create in the selected medium of Cinema 4D. The medium is very difficult and takes time to learn and adapt to.
Bibliography
- Foley, Patrick. “Patrick Foley.” Skillshare, Patrick Foley, 2017, www.skillshare.com/user/patrick4d.
- “Who Is the 3D Rendering Artist? | EASY RENDER.” Influences of Technology on Architecture and Design | EASY RENDER, www.easyrender.com/3d-artist/who-is-the-3d-rendering-artist.
